How I use source control for my Umbraco website source code and media
29 Nov 2018
Recently, Marc Goodson wrote some Umbraco Documentation for how to use source control for your umbraco projects.
It was a great article and I encourage you to read it.
The reason for this post is to touch on the points raised in that documentation article and share with you what I do about backing up the media from my project.
I use GitHub for my projects because it has great integrations with all of the big services, making it really easy to deploy my websites or publish nuget packages.
When thinking about deployments, there are some things to consider, so that you don't back up pointless files and folders that will get regenerated.
What folders and files to exclude from source control.
Marc's post goes into greater detail on this, but for the main web project here are the files and folders which I exclude from source control.
# Note: VisualStudio gitignore rules may also be relevant

# Umbraco
# Ignore unimportant folders generated by Umbraco
**/App_Data/Logs/
**/App_Data/[Pp]review/
**/App_Data/TEMP/
**/App_Data/NuGetBackup/

# Ignore Umbraco content cache file
**/App_Data/umbraco.config

# Don't ignore Umbraco packages (VisualStudio.gitignore mistakes this for a NuGet packages folder)
# Make sure to include details from VisualStudio.gitignore BEFORE this
!**/App_Data/[Pp]ackages/
!**/[Uu]mbraco/[Dd]eveloper/[Pp]ackages

# ImageProcessor DiskCache
**/App_Data/cache/

# We don't need the packages folder because they get restored if they are missing
/packages

# Ignore the user specific files
/.vs
/CodeShare.Web/*.user
/CodeShare.Web/Properties/PublishProfiles/*.user

# Ignore compiled libraries
/CodeShare.Web/bin
/CodeShare.Web/obj

# These get restored with the UmbracoCms NuGet package
/CodeShare.Web/Umbraco
/CodeShare.Web/Umbraco_Client

# We don't want to check our media into source control with the website. This should be separate
/CodeShare.Web/media
What I find interesting about the above ignore file rules are the rules to ignore the /packages, /umbraco and /umbraco_client folders.
NuGet will take care of restoring all of these, so if you are using TeamCity or AppVeyor you don't want to send all of this with your source control if they get restored anyway.
So what about the media?
As I am not using blob storage, I'm just using a Virtual Private Server (VPS), when I upload media on my live site it isn't backed up in any way. It just gets added to the media folder of the website directory.
This is fine, but when I deploy again, I will lose the media files that were added since I last deployed. A simple solution for this is to create a media folder outside of the website root and then create a virtual directory on the website in IIS.
Create a virtual directory for the media:
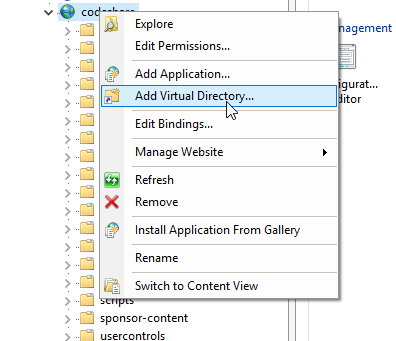
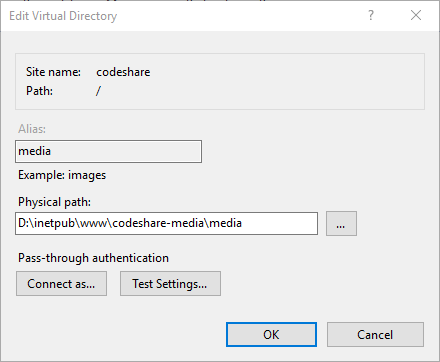
Right click on the website in IIS and chose Add Virtual Directory
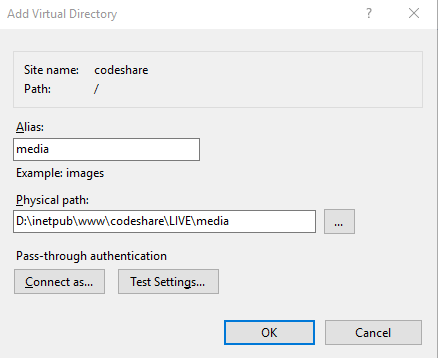
Enter the name of the directory as media and enter the location of the new folder you would like to save the images in.
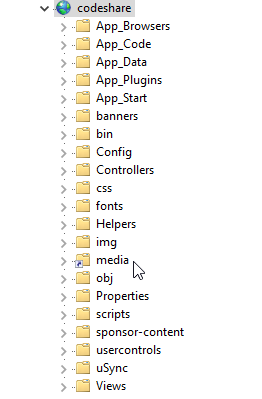
You will see the media folder has a shortcut icon on it now to show it is a virtual directory.
It's good but it's not right
It's all well and good having these images in a separate folder, outside of the website folder. (Don't forget to move the existing media to this folder by the way).
The thing is, we would like to have these images in source control, so that if anything happened to the server we could easily deploy the site to another server without losing anything.
We need to create another source control repository
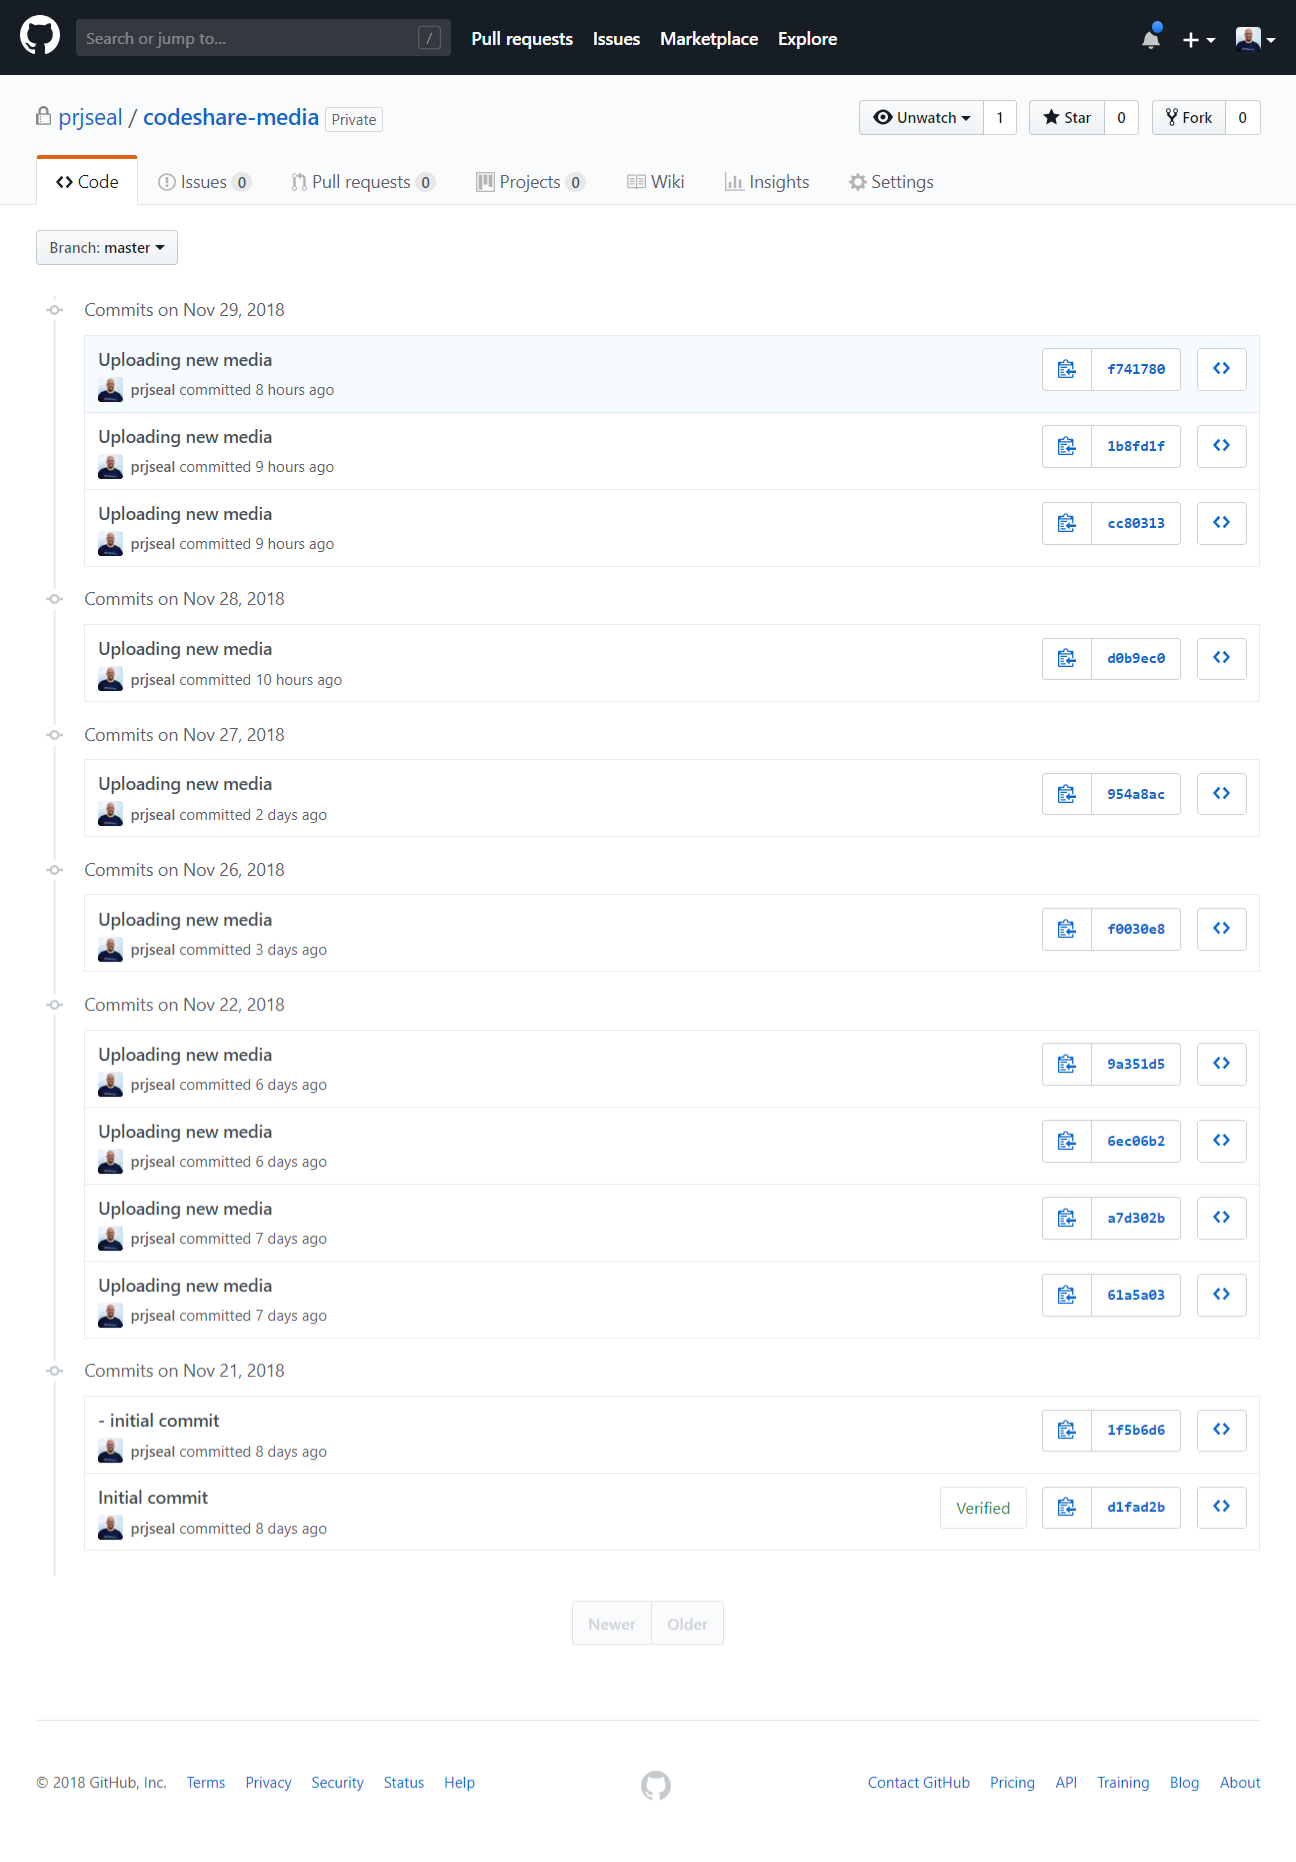
I created a new repository in GitHub called codeshare-media
I installed git on the VPS and cloned the repository outside of the web project folder. I put my media items in a media folder within this new folder directory and updated the virtual directory to point to this new media folder.
We are nearly there
So now we are nearly there, when we add any media on the website, it will go into this media folder. We can then run the commands in the console to commit the changes and push them up to the repository.
Let's automate it?
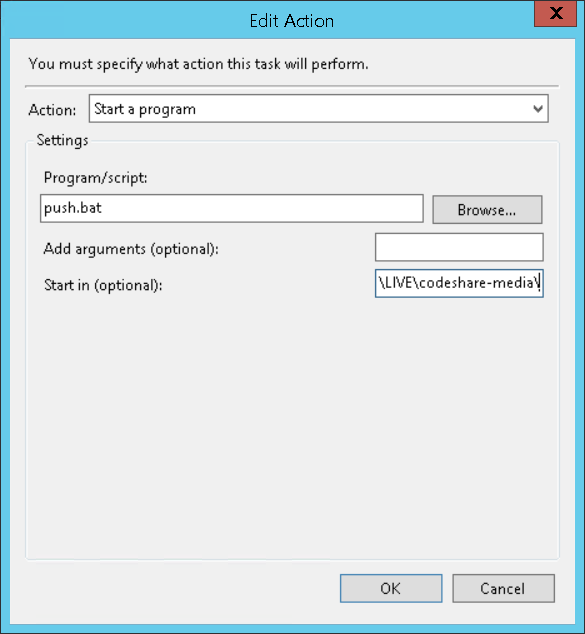
Firstly create a .bat file in the codeshare-media folder call it push.bat
Add these 3 lines to the file and save it:
git add .
git commit -m "Uploading new media"
git push
You can double click on the file and it will execute the 3 commands. This will push the changes to the repository.
Create a scheduled task
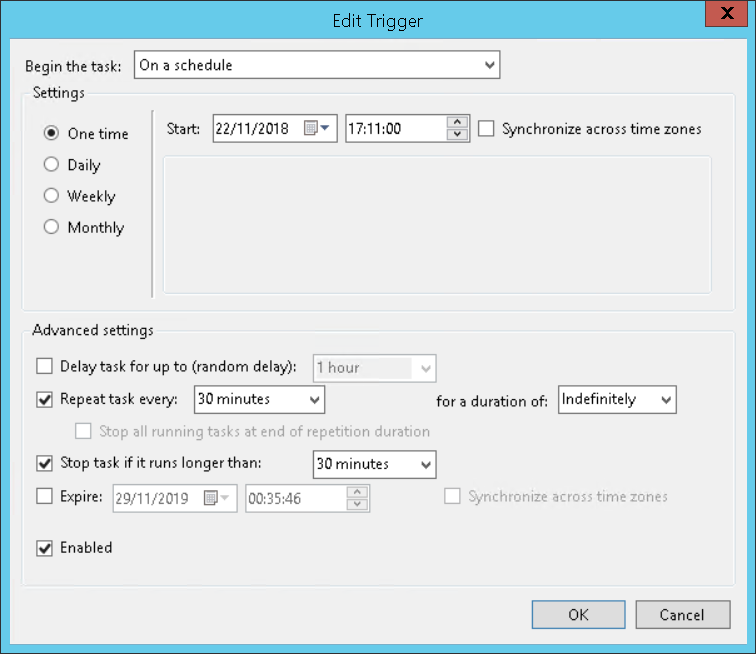
The last thing to do is create a scheduled task which will execute this .bat file every 5 / 30 / 60 mins or whatever.
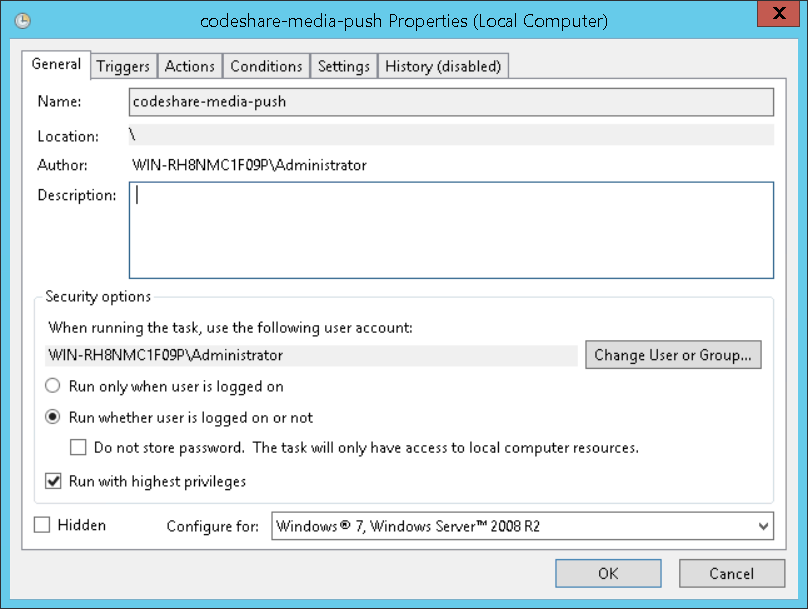
Open the Task Scheduler and create a new task
Create a trigger
Add an action to execute the .bat file
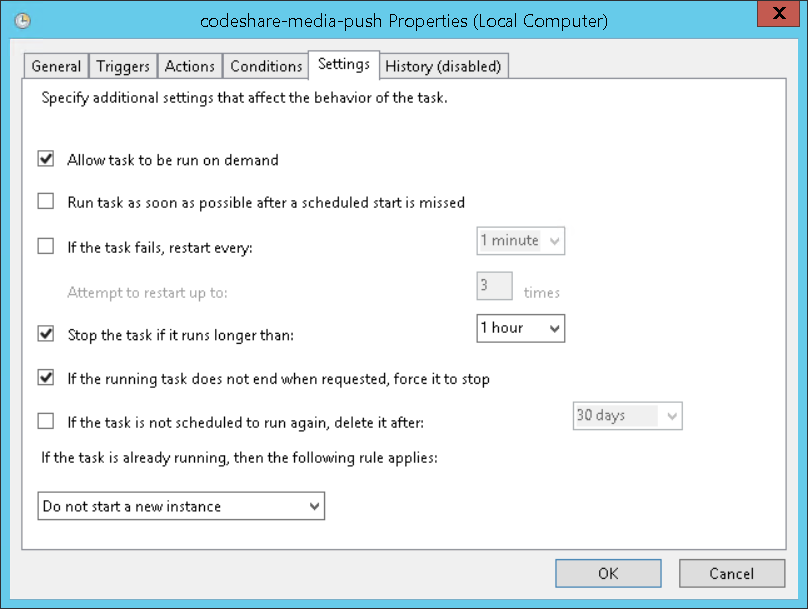
Change the settings to make sure the application exits if it runs too long.
All set and ready to go
You can run the task manually to test it, but if you've followed the steps correctly it should just work.
Once it is running on a schedule of every 5 / 30 / 60 minutes, it will start picking up the changes and you will be able to see the media files getting added to your git repository.
I hope you found this post useful.
